VPS101: Renting A Slice of A Computer on the Internet
Table Of Contents
If you read this page, you are probably thinking of renting a server to host your site or run any application that needs to be run 24/7. However, there are a lot of terms to get started and most of the guides out there is provided by the hosting provider themselves (surely they wouldn’t be biased). Hence I made this document just to share a little bit about this server thingy, and hopefully by the end of it, you can make a decision and are able to rent a server yourself!
Assumption & Prerequirements
- You have somewhat used
Linuxbased operating systems (eg.Ubuntu,Arch,Debian,CentOS) and used its command line to the extent that you can traverse the file system, read/write files, and execute commands. If not, you can learn it quickly from this tutorial from Canonical. - You are interested in tinkering and getting your hands dirty with these servers. If you are looking for
something drag and drop or 1 click installkind of experience, this is probablynotfor you.
Background
Your site is running on a computer. Everything accessible on the internet is running on top of some kind of computer. You might think, no, my site is running of some free platform like NeoCities! Believe me, in the end, that too also run on top of some kind of computer (by computer I meant - compute capable instance(s)). We call a computer that is serving something as a server.
But running your site on a dedicated computer machine is usually overkill for the average joe. Your blog after all, might not hit millions of concurrent visitors needed to max out your computer resources such as CPU/Memory/IO. So people began thinking, is there a way that we can share this computer among several users running several programs on their own?
The problem is not as easy as it sounds. You might think well, since a computer can have multiple users, just separate each user to its account! But then this approach would lead to a whole set of different questions, for example:
- How can we make sure that the users does not affect each other?
- How to split the resource (eg. CPU/Memory/Disk) evenly?
That’s where virtualization comes in! Imagine that you have a computer. It has 8 cores of CPU, 32 GB of RAM, and 500 GB of disk. Virtualization allows you to slice this resource. Lets say that you define each slice as 1 core, 4GB of RAM, and 60 GB of disk, then you spawn 4 of them. Each of this slice would be separated from each other (there’s a lot more detail on how much they are actually “separated”, but let’s just say they are completely exclusive from each other for now), have their own slice of resource where they hold exclusive control of it, and is almost identical to having your own separate mini computer! This slice of machine is typically called as virtual machine.
The creation of virtual machine increase the utilization of a machine. After all, now you can cram a lot more users in it without worrying about the usual implications that comes if you only separate them on OS user account level. It also makes things more accessible for people, as now they don’t need to rent out a dedicated server, you can just rent one of the virtual machine running on top of it.
We call the provider that rent out these servers as the hosting provider. The virtual machine often abbreviated as VM sold by them is called virtual private server or VPS. We will ignore the term of virtual dedicated server or VDS for now. Enough with the jargons, let’s get started!
Searching for a Hosting Provider
There are thousands of hosting providers out there and they have their own offerings. How do we choose the best offering comes down to some key considerations:
- The reputation/credibility of the hosting provider
- The specification of the server
- The quality of the server (eg. uptime, overselling rate, hardware age, etc)
- The location of the server
- The price of the server
You might consider one thing more important than the others or you have another checklist. Here we will discuss these as the key considerations one by one.
Places to look from
Depending on your budget and needs, here are some great places to start your search:
-
Ultra cheap / low end
Your best bet would be to search from LowEndTalk/LET and its sister site LowEndBox/LEB. A bit of a precaution, while the providers there are generally among the cheapest ever possible, they might include scammers, shady operations, or just flat out HostedInMyGarage™. I suggest not to start using this as your first VPS. You’ll have more headache for saving a few bucks.
-
Cheap but Proven
- Hetzner is the OG and arguably GOAT of
thrifty hosting. Their pricing is way lower than the mainstream provider (at least half), but they had such a great infrastructure to the point that you might not notice any difference with the mainstream. They only offer locations in Europe sadly (2025 update: now they have US locations and even Asia for their VPS!), and expect low to no support unless it’s an issue from their end. - ScaleWay also offer a very similar experience in comparison to the mainstream providers, but more affordable. Compared to hetzner, they are more focused on their cloud/vps offerings. (Hetzner is more known for its ultra cheap dedicated servers). They also only offer locations in Europe.
- OVH is also another great provider for cheap VPS. Their uptime SLA guarantee is a bit lower than usual (your site is more likely to experience occasional downtime), depending on the product range you choose. The upside is they offer a lot more locations compared to ScaleWay and Hetzner.
-
The mainstream
These providers provide VPS and other kind of servers for quite an accessible pricing (usually from $2.5 per month) up to thousands per dollar per month. They are somewhat popular and have established their names, so you can worry less about their reputation/quality.
Notice that I didn’t put some bigger providers such as AWS, Google Cloud, and Microsoft Azure. They are the biggest player in the industry and their product is usually way more complex than your usual providers, as they target large corporations as customers. For this reason, I would recommend not to use them as your first VPS.
And as per usual, you can also Google it yourself!
Checking credibility
You can skip this process if you're selecting one of the providers in 2nd or 3rd point, they are relatively trust worthy. On the other hand, you better check thoroughly if you choose to purchase from LET or LEB. I will use HostHatch as an example.
-
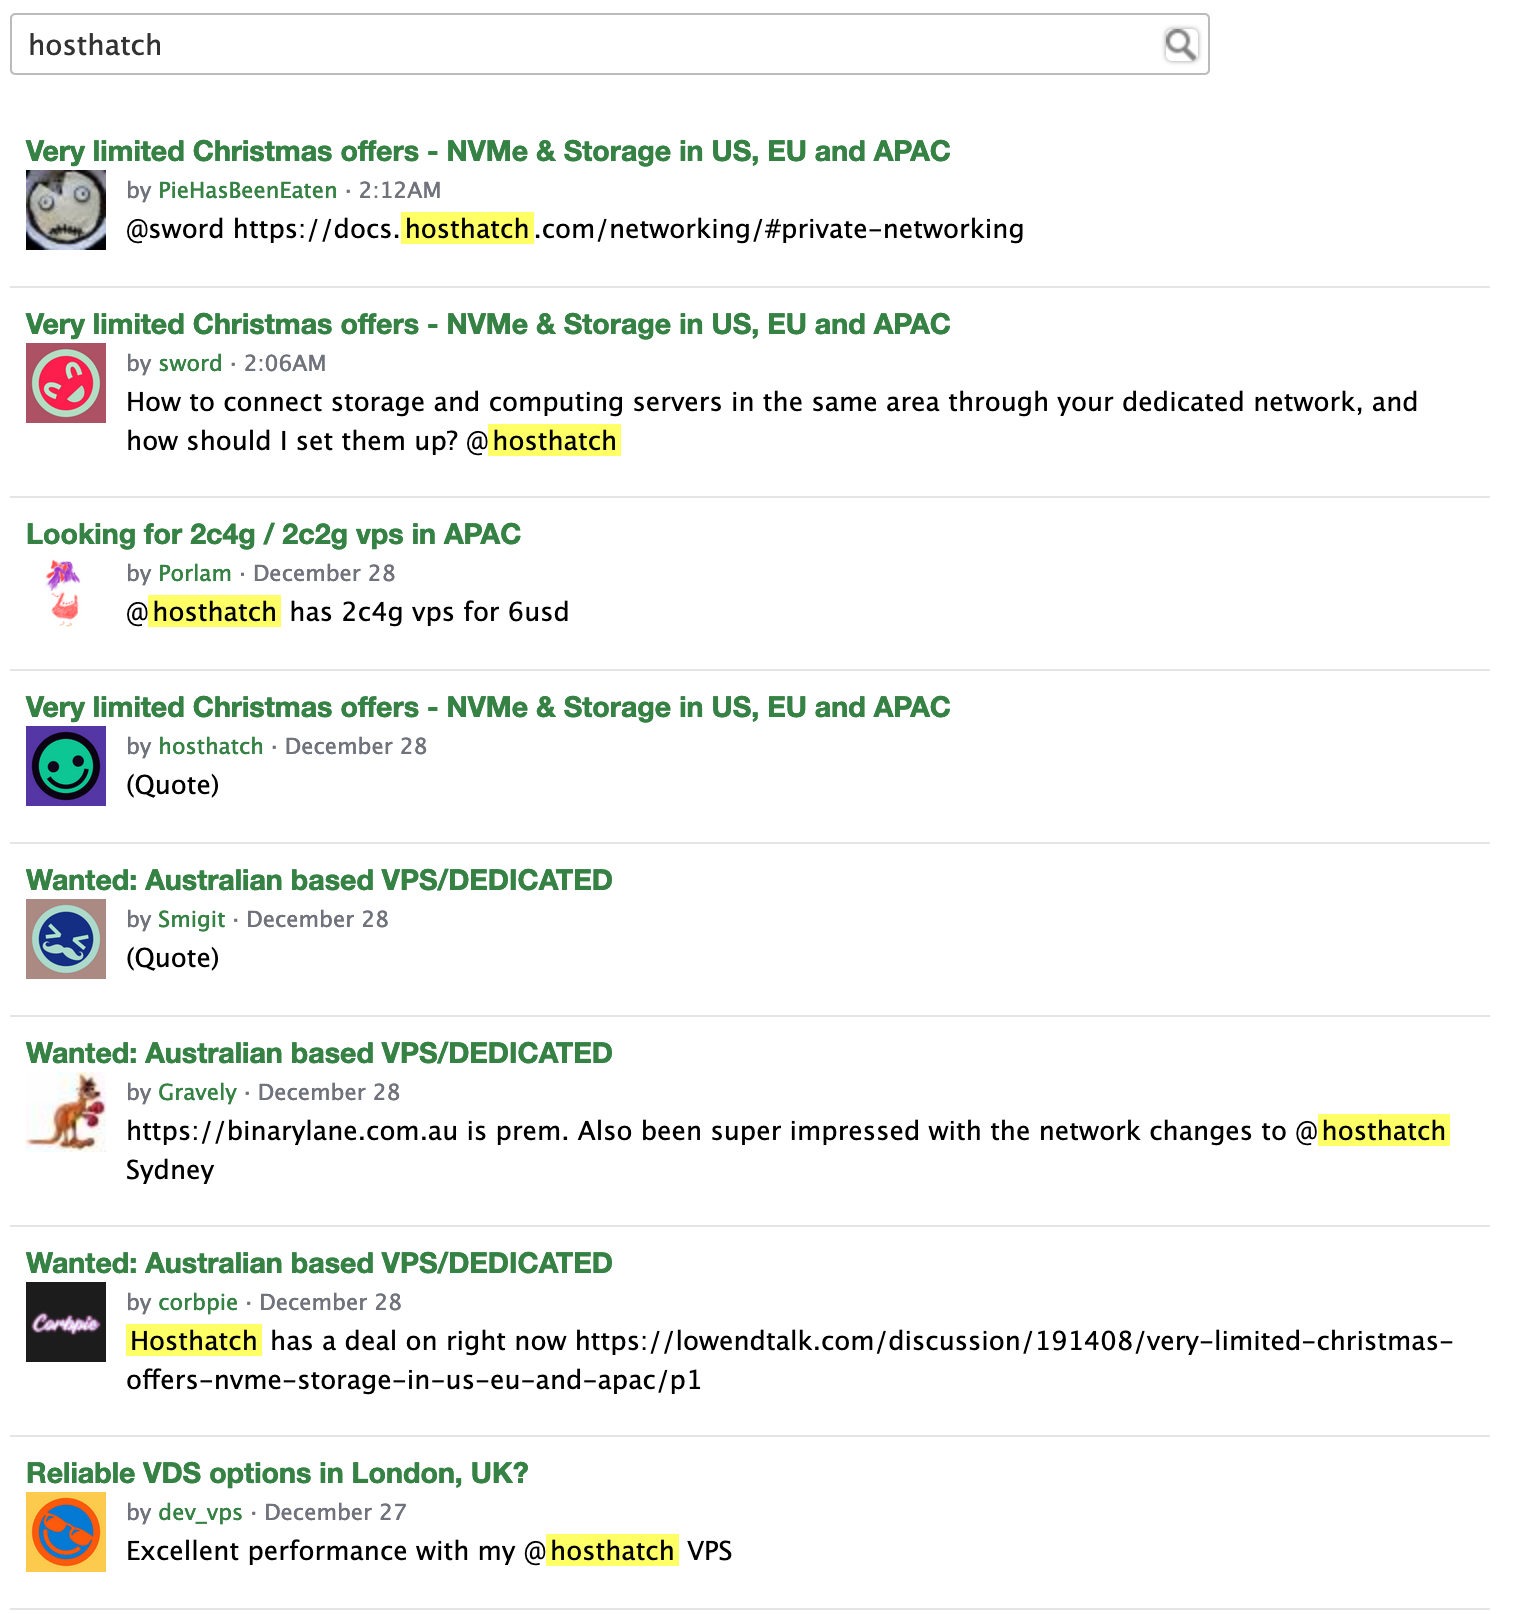
Check for reviews
The first and easiest step is to simply search for reviews and complaints on LET. As you can see from a simple search, our provider seems to be quite reputable, judging from the praises and recommendation from their customers.
-
Check for looking glass
A good provider usually provides something called a
looking glass. These are servers hosted by them used for testing from the customer perspective. You can check things like latency (how long does a request take to go to that server from your computer, and back) usingping. You can also check the internet speed by downloading a file from the server.
You can choose the location that you want to test from (it does not necessarily need to be in the same region as you! thinking of which location will be closest to your visitor is usually helpful).
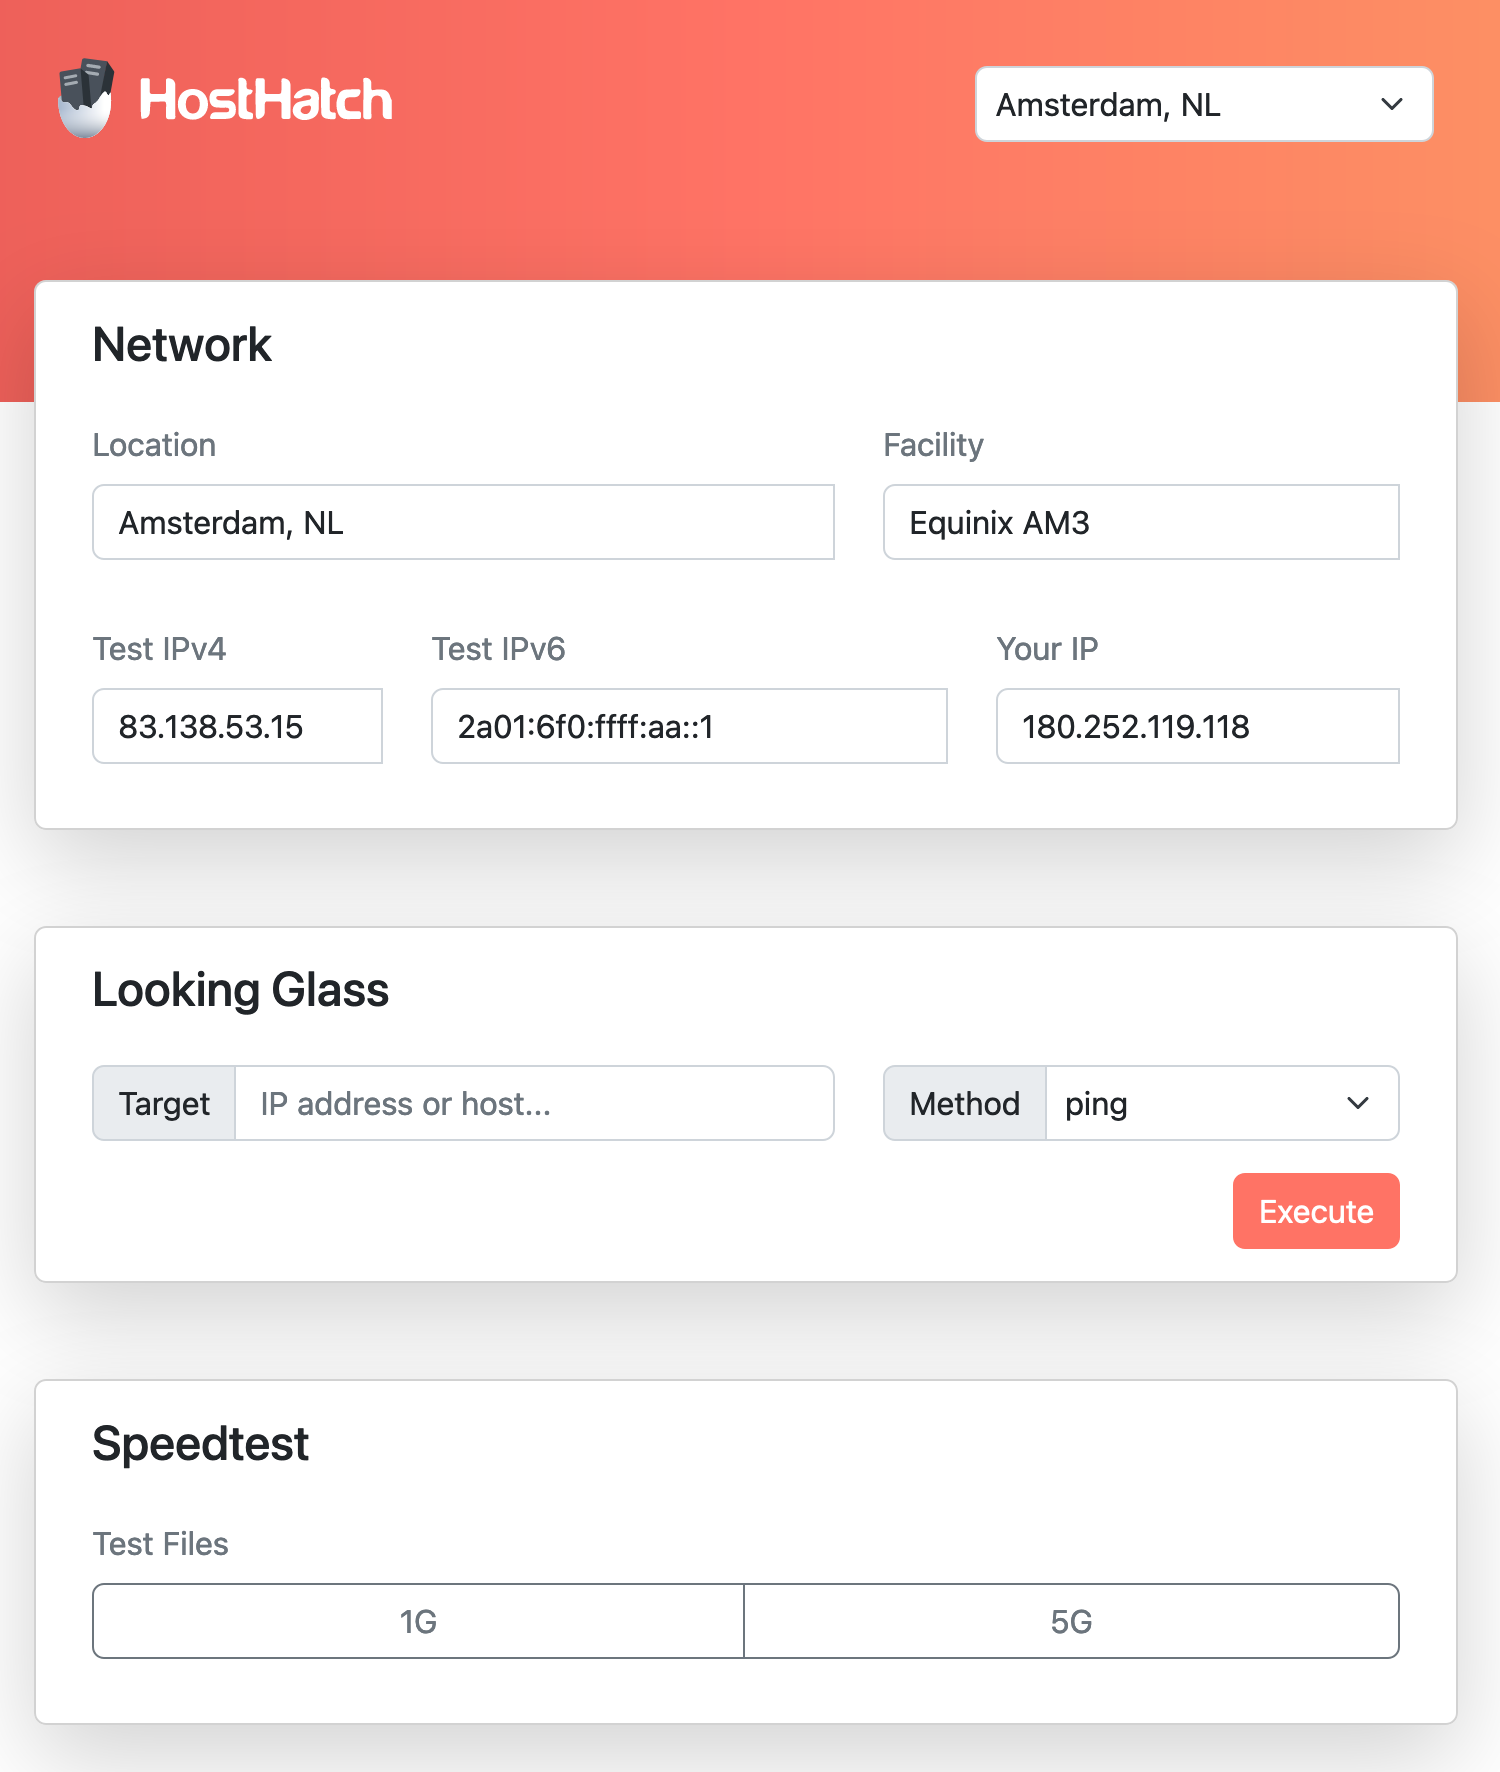
Then you can try to download the test file (by clicking the test files button), in which you should compare the speed you get vs the speed they claim they have (eg. in this case hosthatch claim to have 40Gb links, but not much info about the per VPS). Note that your internet speed itself might be slower, so make sure you also do a speedtest of your machine. A good network speed should be as close as possible to the limit (either their advertised speed or your speedtest, whichever is lower).
On another note, please take attention to the distinction between Mb (small b) vs MB (capital B). The former stands for
megabitwhile the latter stands formegabyte.1 megabyteis equivalent to8 megabits, this logic stands for other units such askiloorgiga. Here is a good table to know about the rest of the units. -
Check for IP ownership
On the looking glass, you can see that the provider listed the looking glass server IP (in this case
83.138.53.15). Let’s search more information on that IP using IPInfo.io.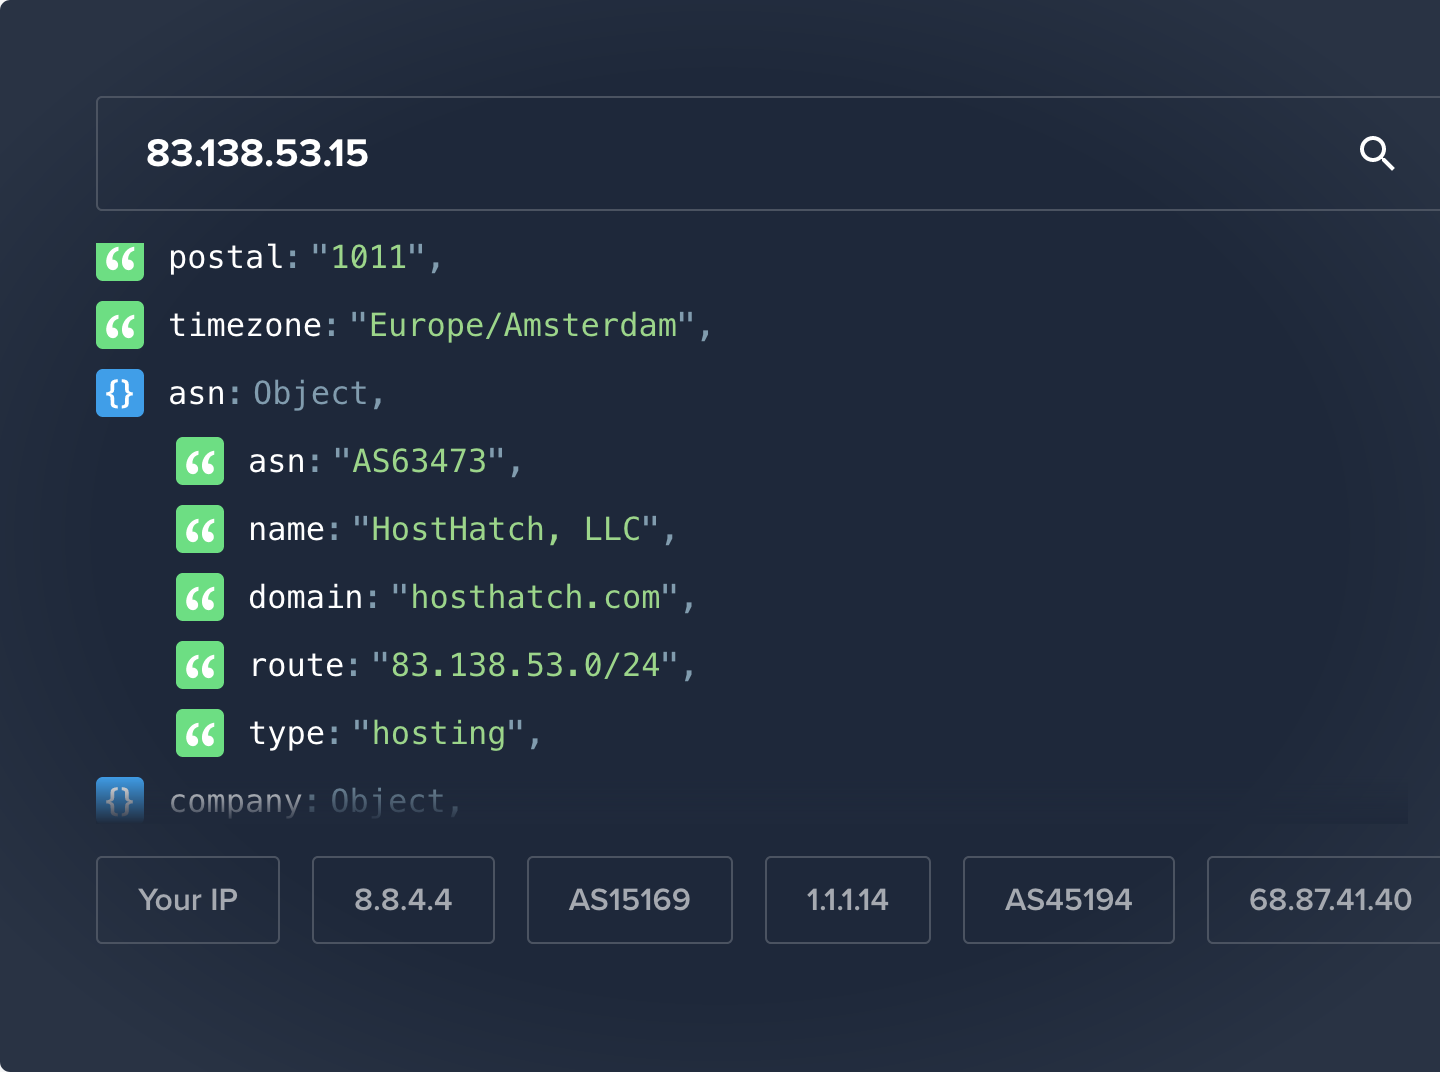
There are several object of interest that we have here. First we need to make sure name of the company and domain matches our provider (which yes it is!). In case of the name differs from the actual provider name, it might be an indication of our prospective provider is a
relatively small reseller. In most cases, it’s better to just buy from that provider (which has its name in the info) directly, cutting the prospective provider which is just a middleman. With that being said, this fact alone is not a deal breaker, just take note that you are most likely dealing with smaller company or individual, which might or might not be understaffed.The next thing we check is the ASN (in this case, hosthatch has
AS63473). Try to find that number against this SpamHaus DROP List andif all went well, you shouldn't be able to find it.If you find the ASN in the list, steer clear from that provider! This is the list of recommendation from spamhaus for others to avoid this ASN. You will most likely not get satisfactory network quality with that provider if its ASN is found there.
And that’s it for the first step! If your hosting provider passed all the thing listed here, it’s relatively trustworthy for the time being. Note that some great providers still eventually filed for bankruptcy due to their unsustainable pricing. Just make sure you have a copy of your data locally and you should be fine!
Deciding on VPS specification
This one is a bit tricky. A lot of things depends on what exactly do you want to run?. There are a few easy way to have an approximation:
-
Run it locally first
If you are running a dynamic site or any other kind of programs, try running it on your local computer first. Then you can open any task manager that you have and see the resource usage. As a rule of thumb, double that number for your VPS specification to give you some wiggle room for growth.
-
Static sites
If you are hosting a static site, 1 vCPU core + 1 GB of RAM should be sufficient until you reach thousands of visitors every second. This is assuming you don’t host anything big (file size
< 100KB), in which your weak link might not be CPU but rather network bandwidth. Typically, the smallest offering of the mainstream provider should be enough.
For bandwidth, typically a hosting provider would provide 1Gbit network connection. It should be enough for most personal project. For disk, it should be just how much space does your program + data takes, + 10GB for the operating system.
Checking server quality
Quality is subjective. With that being said, there are also several objective metrics that could indicate whether the quality leans towards which side of the spectrum. For example, we can check for the uptime of the provider. Uptime is defined as the amount of time server is working normally / total time. You can find the uptime by searching for <provider name> status page on any search engine. Here’s one from HostHatch.
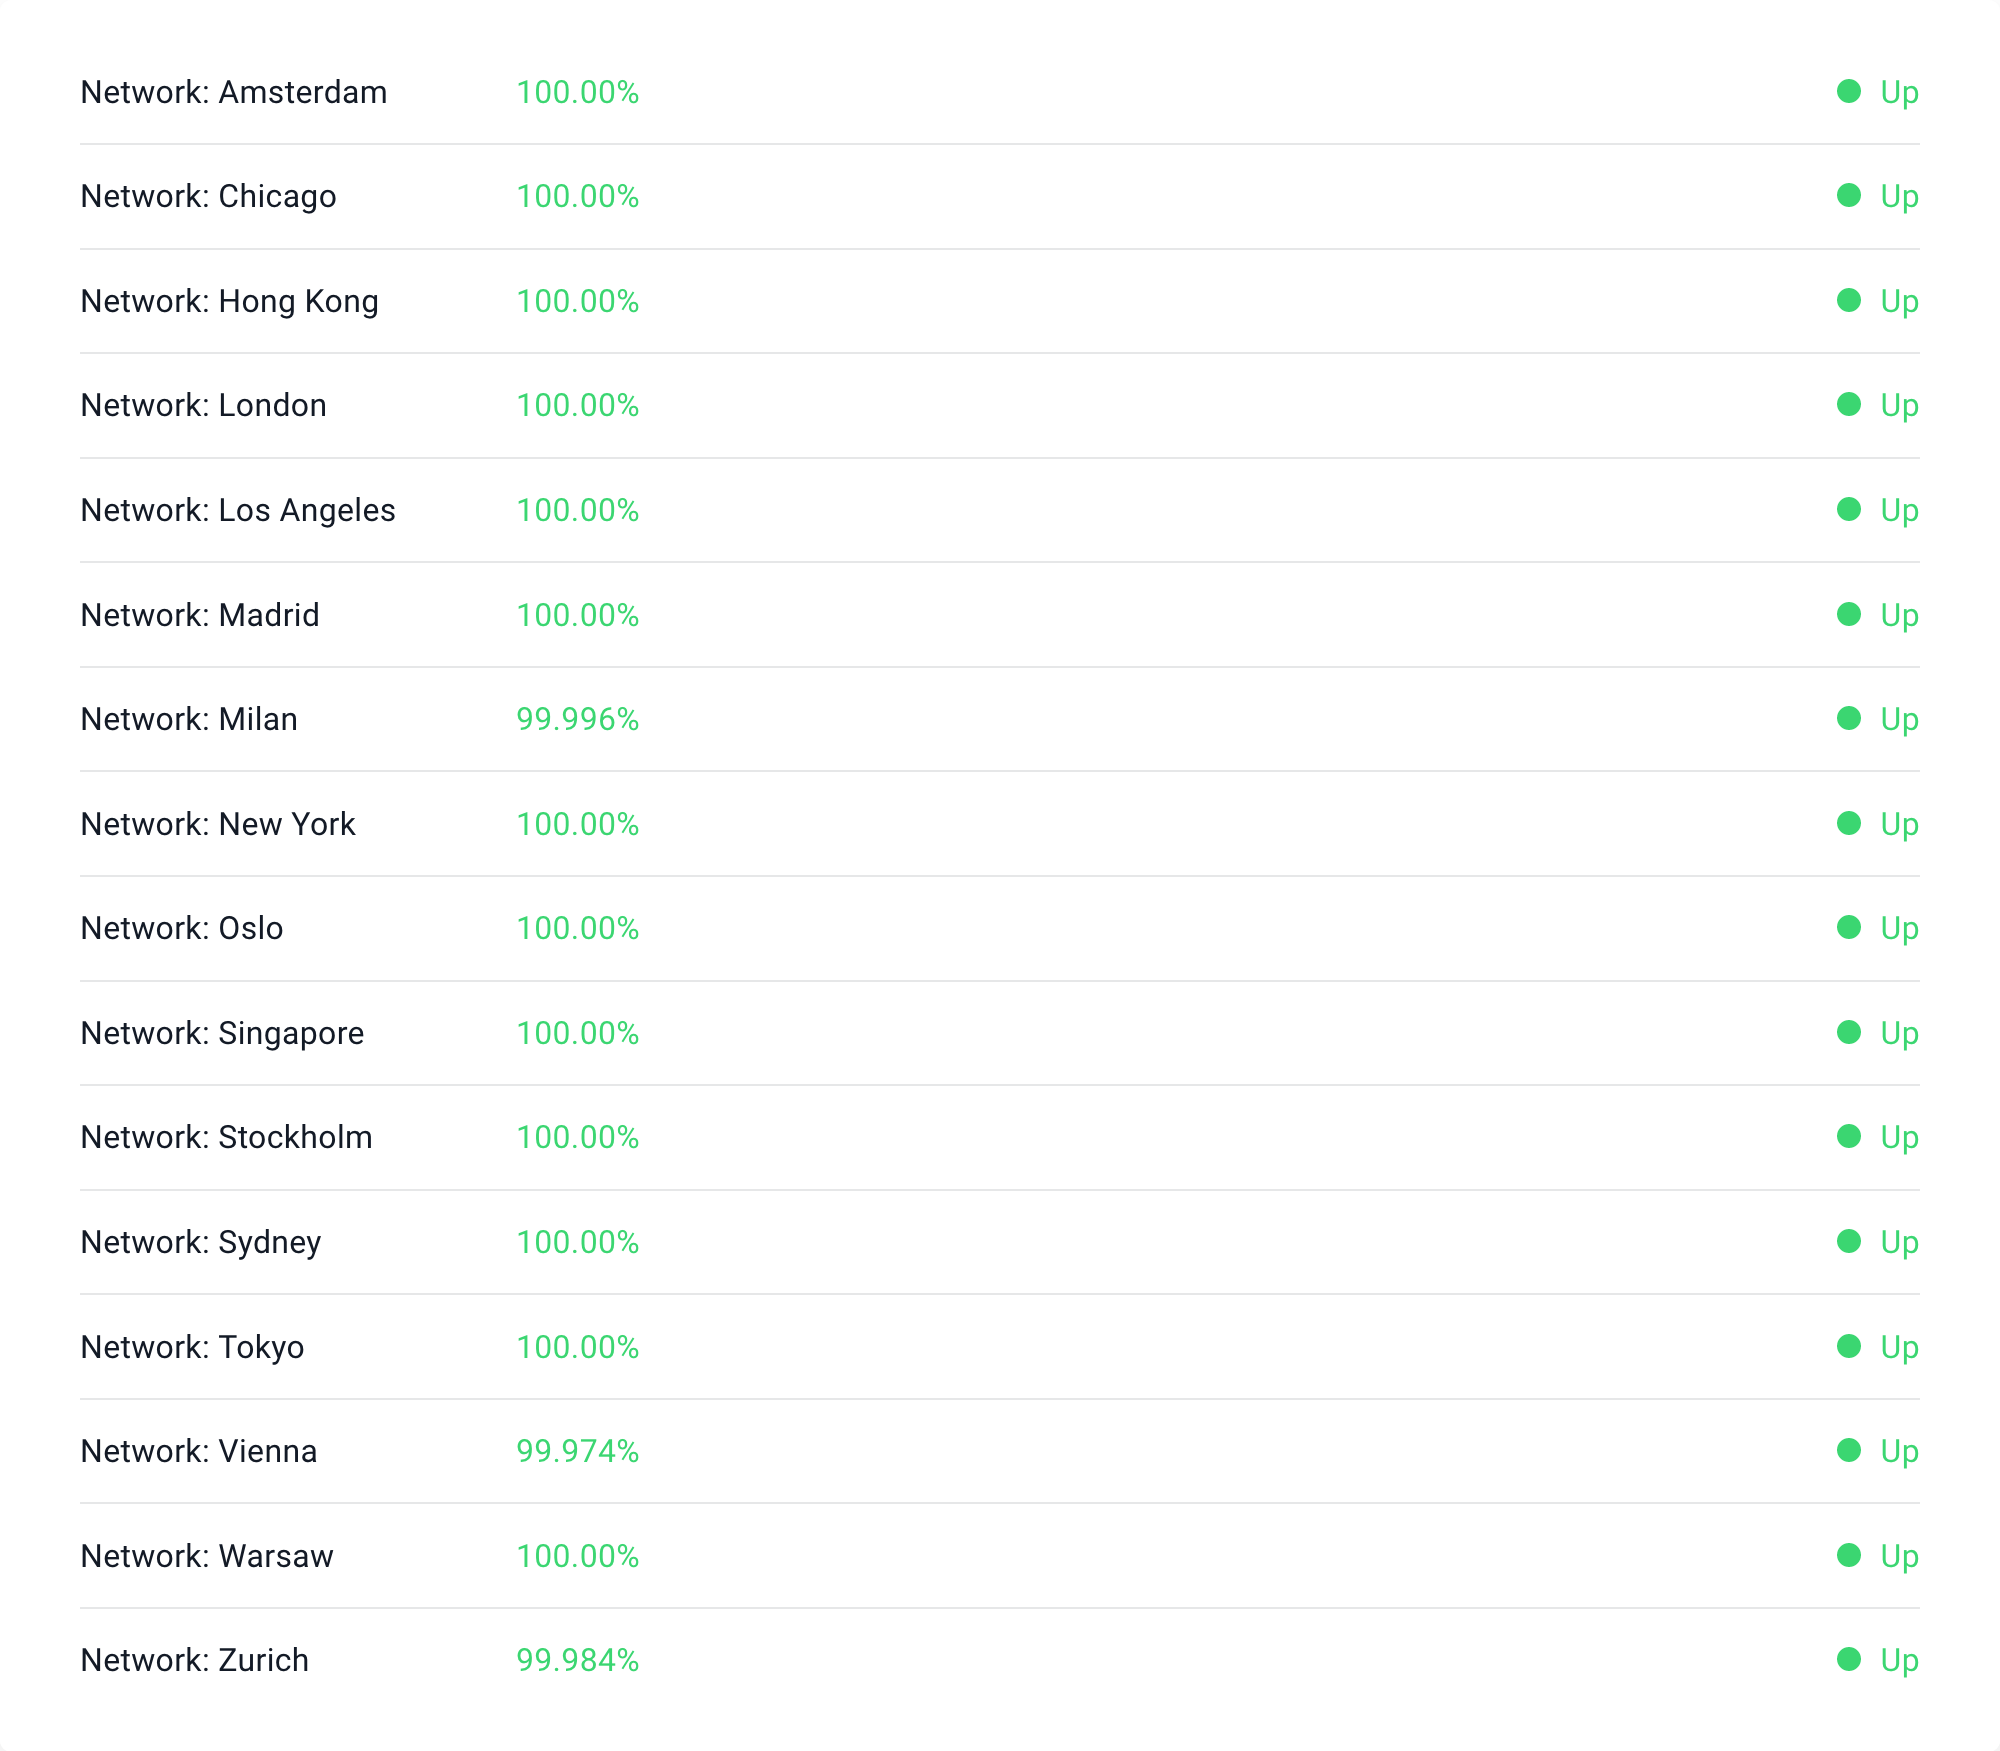
As you can see, for the last 90 days period, Vienna location experiences more problems than lets say Tokyo. You can interpret this information as you wish for your use case.
The other thing we usually check for is the overselling rate. To put it simply, imagine that you slice a computer into 8 equal pieces used by a different user each. The users are different, therefore they also most likely have different utilization. As a result, the computer might still have room left to put another 2 VMs with the same size into the same computer. This practice is called overcommit, where you allocate more virtual resources than what you actually have in real life. This alone is not a bad practice, the issue comes when the server/computer is experiencing huge workload.
Imagine that one day, all 10 users (8+2) maxed out their CPU usage but the actual server only has 8 cores of CPU! On the best case scenario, the server will be over saturated and it will slow down as a result. On the worst case scenario, the server itself might crash, or your VPS might get forcefully migrated away from the over saturated machine.
Obviously, this practice is not being put onto the front by the providers. There is also no rule or law that enforces them to put how much do they actually oversell. But fret not, there’s a way to approximate this, and that’s by looking at their Fair Usage Policy or Acceptable Usage Policy. In this case, HostHatch doesn’t provide an exact number, but you can take a look at their offering description.
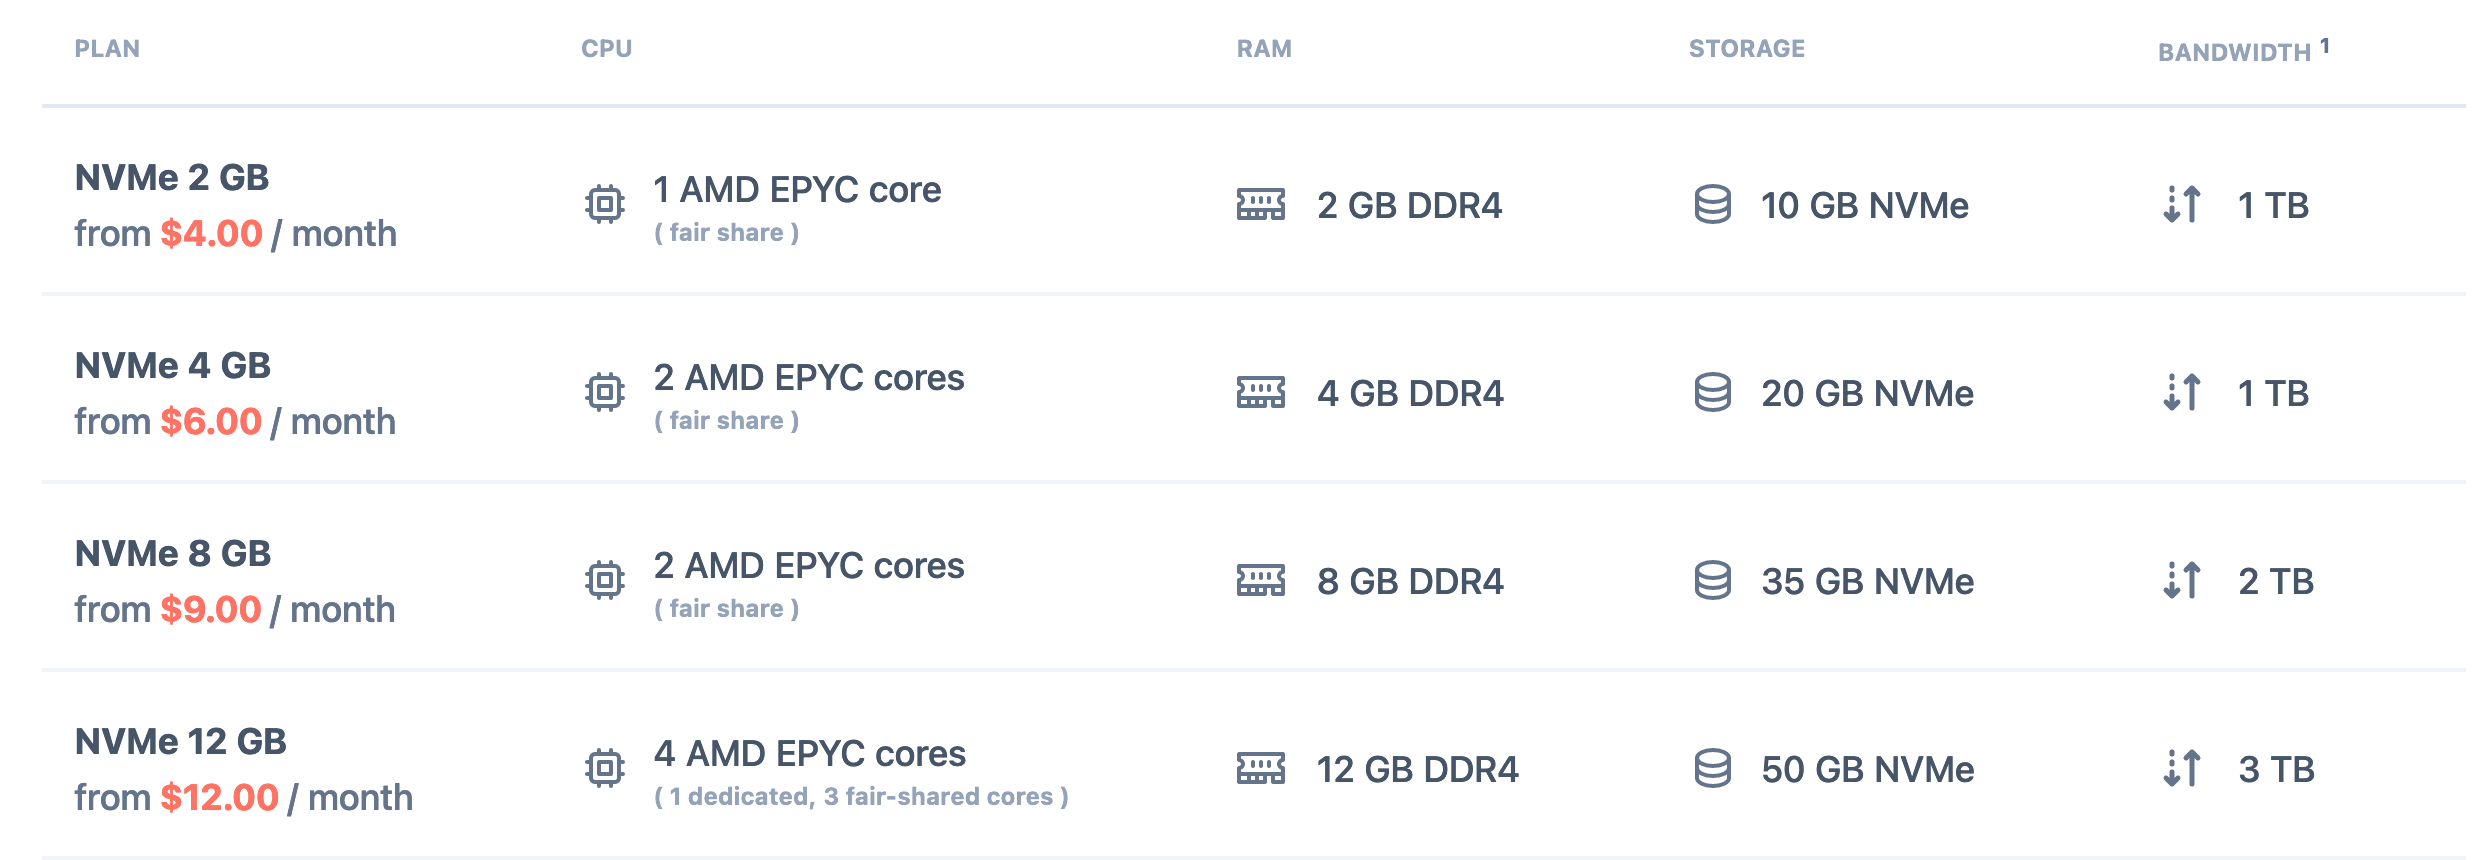
As you can see, the smallest package offer 1 fair share CPU core. This usually means you can only use 12.5% to 50% sustained CPU load over a long time period (you are allowed to use 100% for short period of time! we call this burst usage). The dedicated CPU on the other hand usually means that there’s no other user using that CPU slice. You can utilize 100% out of it without a problem.
If the provider that you are interested in said a low maximum sustained load limit, it’s a good indication that your provider cram more VPS into a server to make it cheaper (oversell)! Whether that percentage is acceptable or not, you can decide by yourself. For me personally, I wouldn’t pick any provider that says their sustained CPU usage limit is less than 25%.
I have decided on the provider! Now what?
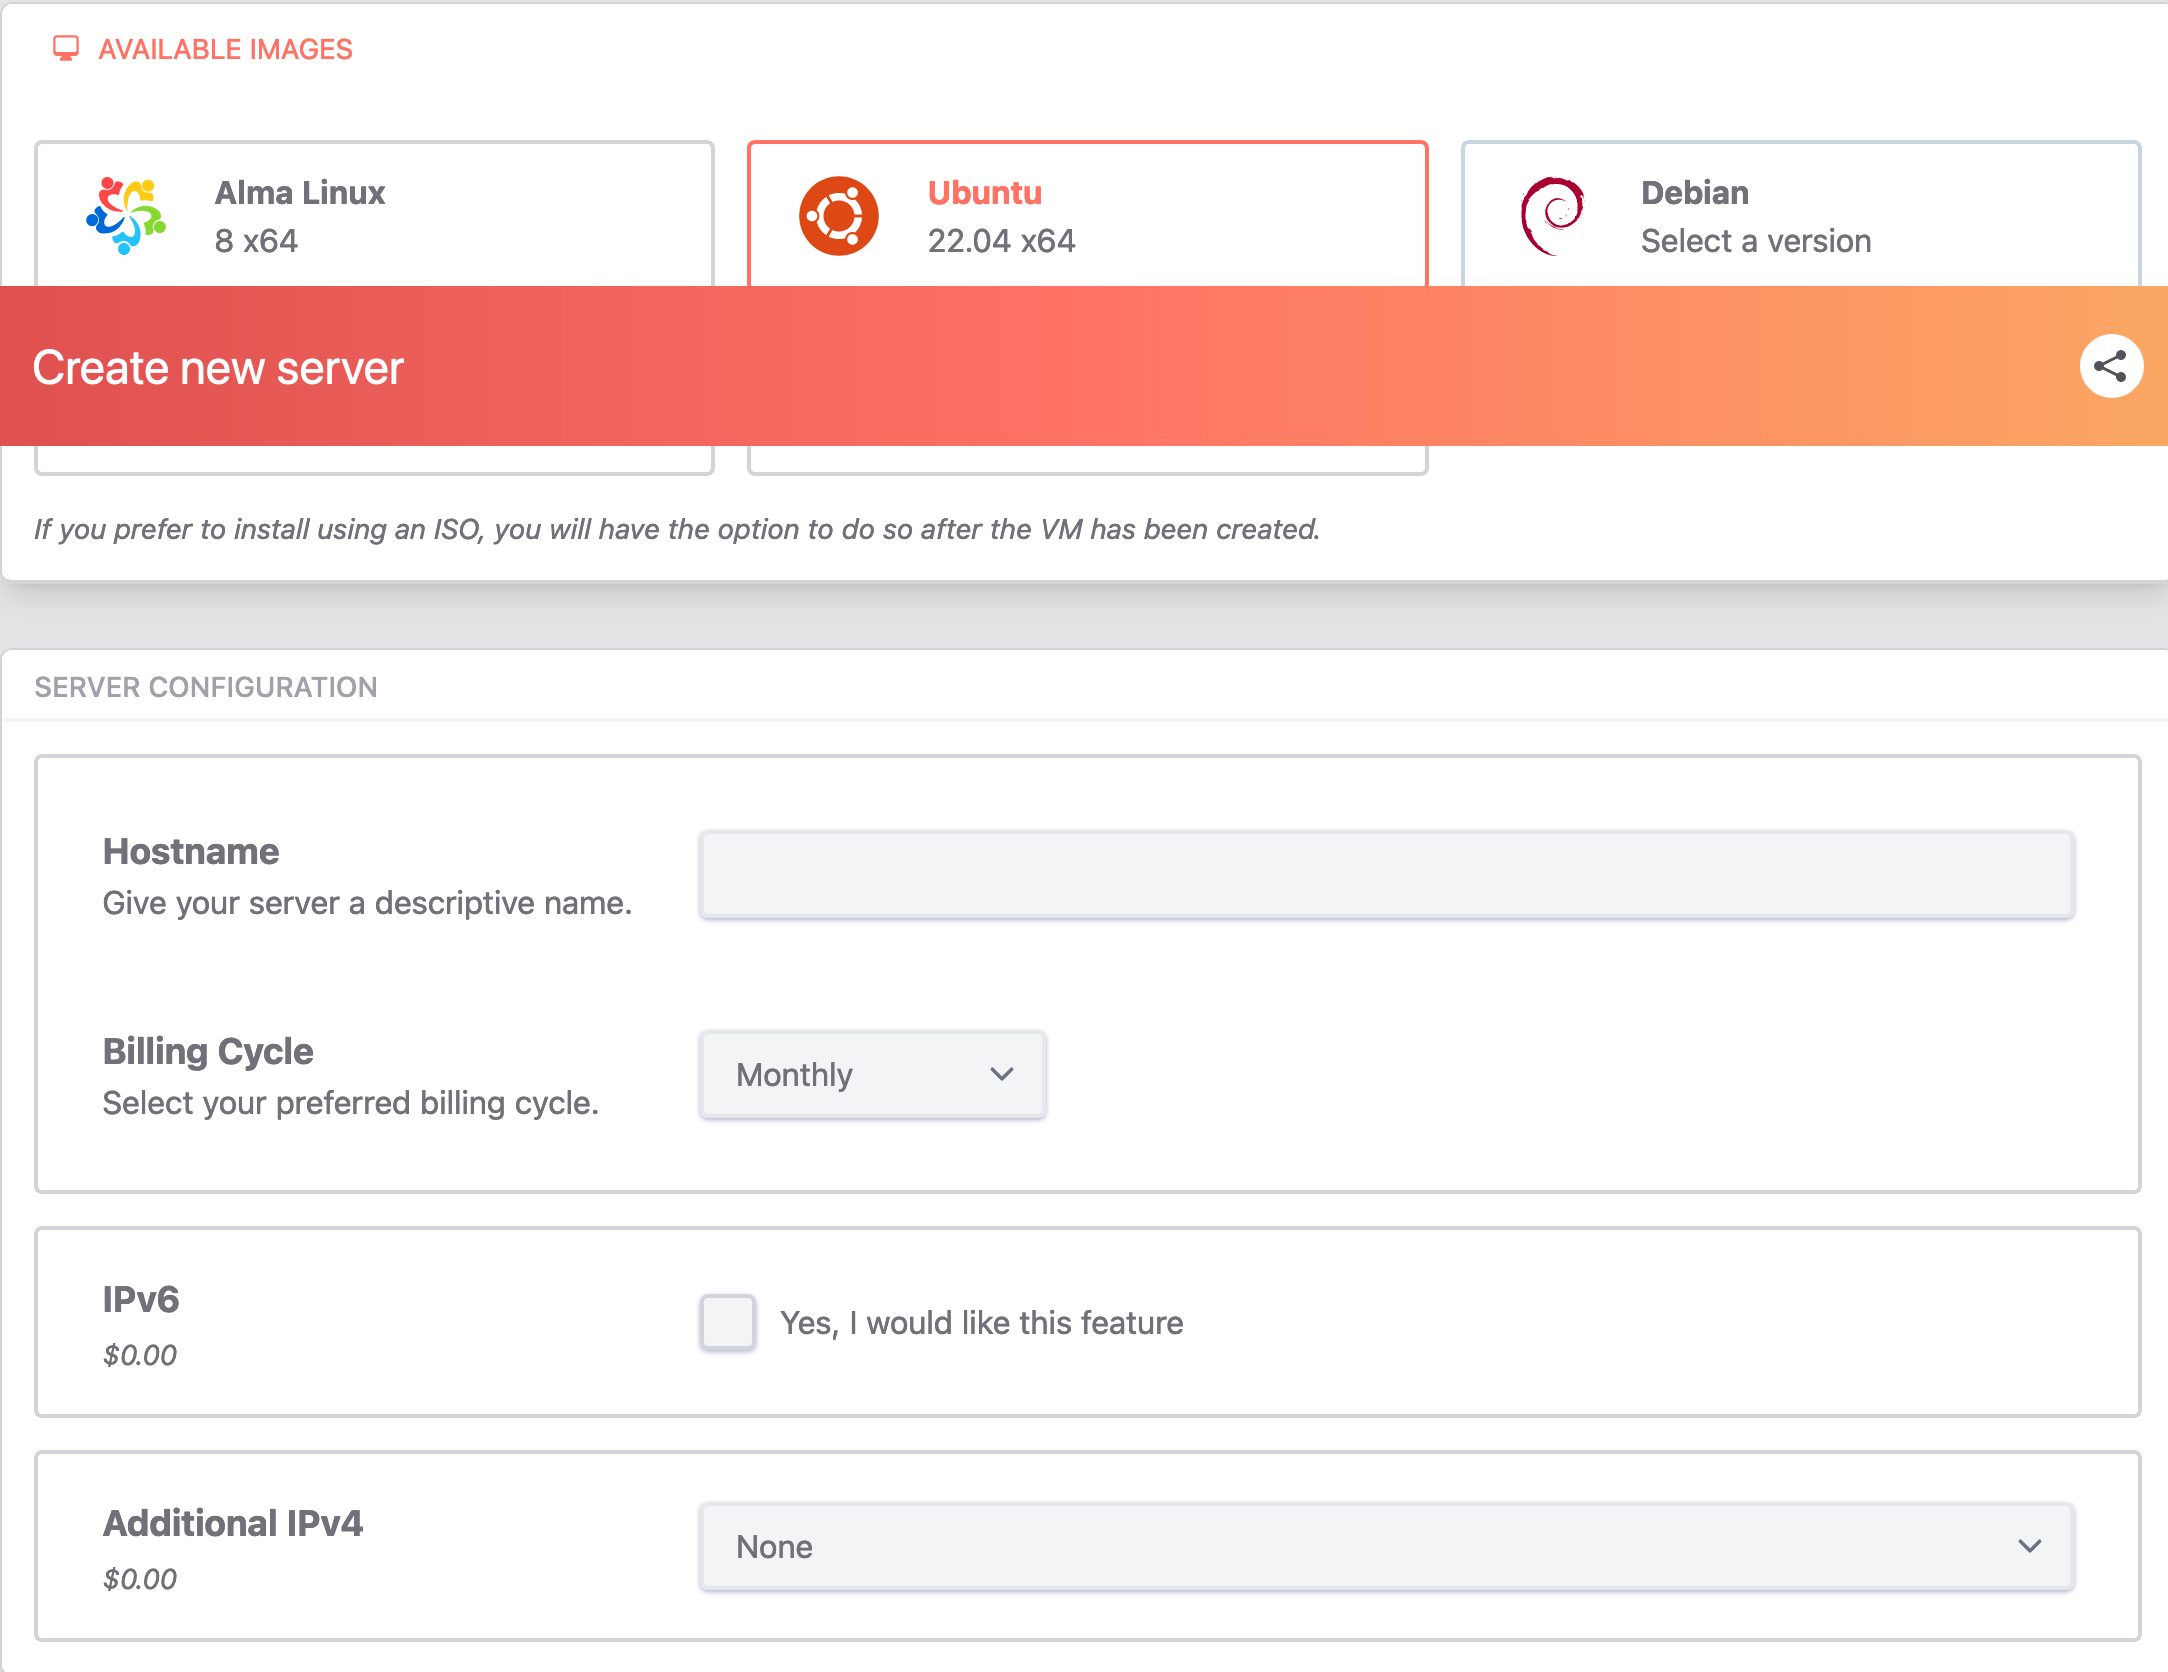
Now my friend, its time to place an order for your server(s)! Here’s a shot walkthrough on what does each fields mean:
-
Operating System / Image
This is where you select which operating system do you want for your VPS. Pick one that you are comfortable with, you don’t need to care about how
eliteorsophisticatedit makes you look like. peeking over to those gentoo & arch elitist.. -
Hostname
Ah, this is a tricky part. This is where you pick your server name.
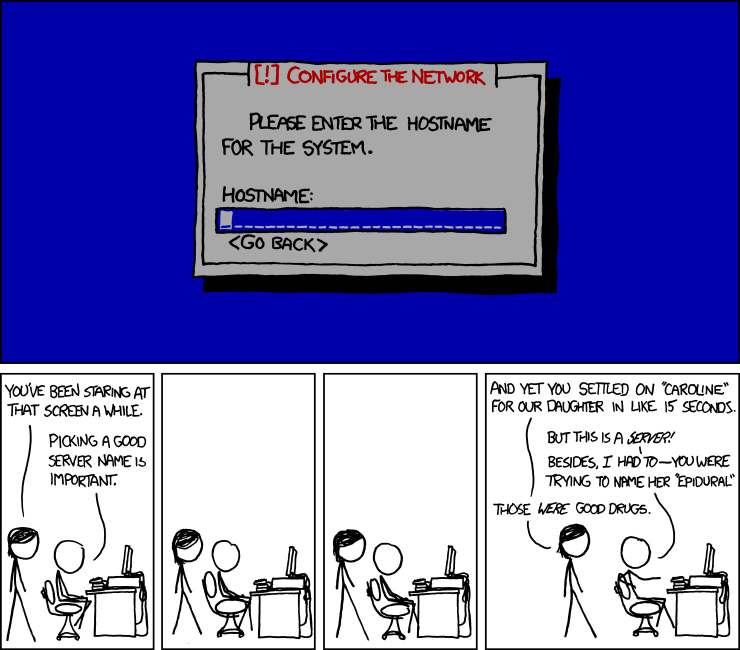
If we’re talking about
consistency, usually I would separate it based on some logical format, eg.server_codename.region.mydomain.com. This would let you to manage your servers easily when you have multiple. But otherwise, pick any cute pet names you’d like for your server! It’s advisable to format it like a domain name (but it doesn’t need to be a domain name you have bought, just format wise.) -
IPv4 or IPV6
If the host is offering IPv4 as
optional, make sure you pick it. While it cost a bit more, generally speaking by the time of this writing, IPv6 support is still meh at best. For first timer I would recommend using IPv4 first. On the other hand, IPv6 is usually offered for free! Just select that as well to future-proof your server.
And that’s all! Usually the rest would be your contact and payment information, which I don’t think need further explanation. The next step would be to wait for the VPS to be created. In case of the mainstream providers, VPS is typically created almost instantly (1-2 minutes). If you buy from a lowend provider, it might take longer as they might need manual provisioning.
Ok, I got my VPS! Now what?
Now it’s time to configure it! Say hello to your new best friend - the infamous Secure Shell Protocol or more commonly abbreviated as SSH. This protocol allows you to enter the server terminal remotely. Here are the rough steps on how to get connected for the first time.
-
Get an SSH client
If you’re using Windows, a client I have been using for quite some time is called Bitvise SSH. If you are using linux/unix/mac based operating system, you can use the built in
terminaland execute the commandssh. -
Get your server information
Your provider should at least provide you with 3 informations:
- Public IP address
- Username
- Password
You can find this information from your provider control panel or sent to your email after purchase.
-
If you are using the
sshcommand, enter this in your localterminal.
ssh username@ip_address
You will be asked for the password, simply paste it in and press enter. If you are using bitvise, you can follow this tutorial. If everything went well, you should see something like this in your SSH client/terminal.
Welcome to Ubuntu 22.04.2 LTS (GNU/Linux 5.15.0-75-generic x86_64)

 * Documentation:  https://help.ubuntu.com
 * Management:     https://landscape.canonical.com
 * Support:        https://ubuntu.com/advantage

  System information as of Wed Dec 27 05:55:03 AM UTC 2023

  System load:  0.080078125        Processes:               130
  Usage of /:   74.2% of 23.34GB   Users logged in:         0
  Memory usage: 25%                IPv4 address for enp1s0: XX.XX.XX.XX
  Swap usage:   5%                 IPv4 address for wg0:    XX.XX.XX.XX

 * Strictly confined Kubernetes makes edge and IoT secure. Learn how MicroK8s
   just raised the bar for easy, resilient and secure K8s cluster deployment.

   https://ubuntu.com/engage/secure-kubernetes-at-the-edge

 * Introducing Expanded Security Maintenance for Applications.
   Receive updates to over 25,000 software packages with your
   Ubuntu Pro subscription. Free for personal use.

     https://ubuntu.com/pro

Last login: Tue Dec 26 07:06:03 2023 from 180.252.126.133
root@vultr:~#
And you can start entering your command there as if you’re using your own machine! After you’re done with it and want to disconnect the session, simply type exit and press enter.
Note: If you are running a program directly on top of your SSH session, it would stop running when you exit the session. In order to run a service, you can use something called as a supervisor, eg. using supervisorctl. Using the system init or systemd is also an option, but that’s out of this tutorial scope.
Ok I’m in! What’s next?
Now it’s up to you to tinker around and use it for your purpose! There are plenty of ideas out there, here are some tutorials that I’d recommend for new people. (I assume we’re using Ubuntu for this list)
and so much more! Go nuts and happy tinkering!
#Self-Host #Vps #Virtual Private Server #Beginner-Guide #Guide